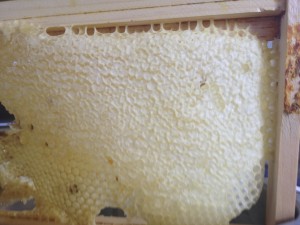
 Over the holiday weekend, I decided the time was right to take a single frame of honey from Sandy. As this was the first honey I had taken from any hive, I was quite excited. Armed with some clever harvesting ideas from my friend Tim, we headed to the hives. With my trusty hive tool, I slowly pulled a single frame from the side of a medium honey super that was completely built out. It had a lot of cross-connected combs, but we quickly sliced through the cross-connects using a kitchen knife I had left in the sun for an hour. By then the knife blade was hot and easily slid through the comb, mostly melting it on contact. Once the frame was cut free of the cross-connected comb, it was easy to pull out. But now what to do?
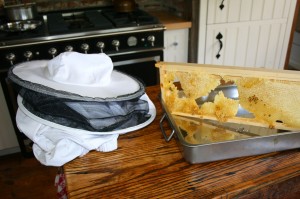
Tim had previously figured out a medium frame would stand up in a metal oven pan we found, so we wedged it into the pan to work on it. As I didn’t use a smoker, there were still a few dozen bees on the frame. A little diligent work with a bee brush pushed most of them off and they returned to the hive. Then we took the frame about 200 feet away from the hive and put it in front of a large, portable fan. The fan blew a gentle breeze onto the frame, and the remaining bees left within a few seconds.
 After checking ourselves and our frame for bees, we quickly took the frame into the house for harvesting. As the frame was still in the metal pan, it was easy to work on cutting away the comb, while any honey drippings fell into the pan. I did the cutting by going around the edges and then down, noting that the comb was thickest at the top, and generally tapered as it went down. Because of this I cut out the top of the comb for snacking on as comb honey (my personal favorite), and then the rest we used an innovative crush-and-strain method invented by Tim.
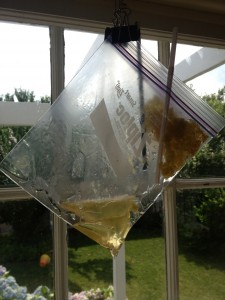
 This method involved putting the comb into a zip-loc bag, trying to get out as much air as possible, and then zipping it closed. Then, with our hands, and later a rolling pin, we crushed the comb while in the bag, being careful not to burst the bag and have honey sprayed all over the kitchen counter. Once the comb was crushed, Tim added a small straw into the flat bag which held the comb off the bottom of the bag. He then clipped the bag up into a window so that the sunlight would slowly heat the contents, and allow for an even better flow. The picture shows two of these zip-loc baggies – one behind each other so you see two straws. Notice the honey pooling in the bottom of each bag. Tim gets the McGyver award for this design.
We let these bags sit overnight, and by morning we set aside the comb and had pure honey in each bag. Now the honey can be poured out, but I found it easier to snip the corner of each baggie and let the honey drain out, a little like a pastry bag. While it does leave some honey residue, it’s very efficient for a mini-harvest of a frame or two. For anything more, I would use the more traditional bucket system, or at least a strainer over some jars.
As for the comb, I put it in a Pyrex cup and heated it in a 1,000 watt microwave for 30 seconds at 30% power. I had to do this a few times to make sure it was all melted, but not boiling. I then poured it through a strainer to remove the impurities, into another Pyrex jar. The idea here is that I want to reheat the wax again, so having it end up in another Pyrex cup means I can just put it in the microwave again. Remember that all items, the cup and the strainer, will be forever coated in beeswax, so I bought a few just for this purpose. I’m sure a dishwasher could get off most of it, but I also think it would clog up the drain. Heed my warning – dedicate cups and a strainer, and don’t plan on washing them very often.
So now I had the wax, which I put aside until I collected more on August harvest, and of course the honey. Tim made a delicious salad dressing with some of the honey, and we drizzled the rest over home made vanilla ice cream.
Thank you to all the honey bees that made this day possible!


2 Responses to A Mini Harvest